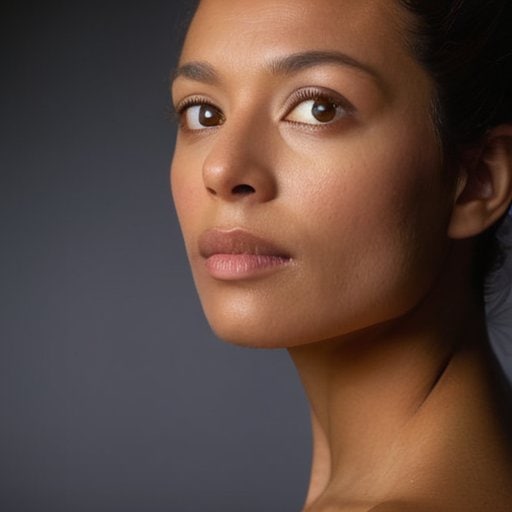
I was halfway through a rainy evening shoot, rain pattering against the studio window, when my assistant shouted, “We’re missing that classic Rembrandt Lighting setup!” I had my key light perched a few inches above eye level, angled just right, and—boom—there it was, that unmistakable dark wedge falling on the opposite cheek. Most folks swear you need a fancy softbox or a 45‑degree angle to pull off the look, but the truth is far simpler. All you really need is a single light, a little imagination, and the willingness to let that shadow fall where you want it.
In the next few minutes I’ll walk you through exactly how to recreate that magic every time, from positioning your key and fill lights to tweaking distance for that perfect triangle of shadow. You’ll get a quick checklist for gear, a troubleshooting table for common pitfalls like “the triangle disappears” or “the light looks flat,” and a handful of pro‑tips that I’ve learned on set after set. No hype, just no‑fluff, step‑by‑step guidance that lets you light portraits like a seasoned cinematographer without the guesswork.
Table of Contents
- Step-by-Step Instructions
- Decoding the Perfect Rembrandt Lighting Ratio for Flattering Portraits
- Strategic Key Light Placement to Craft the Iconic Triangle of Light
- Mastering Rembrandt Lighting: 5 Pro Tips
- Quick Reminders for Perfect Rembrandt Lighting
- The Art of Shadow
- Wrapping It All Up
- Frequently Asked Questions
Guide Overview
Tools & Supplies
- Sturdy light stand – holds the main key light at the proper height and angle.
- Adjustable LED or strobe light – provides the primary source for the Rembrandt triangle.
- Softbox or umbrella diffuser – softens the light to create a natural look while preserving contrast.
- Small reflector (white or silver) – fills in shadows on the opposite side of the face as needed.
- Camera with manual exposure controls – allows precise control of exposure and focus.
- 1 × 250‑W or 500‑W LED/strobe bulb – bright enough for portrait work.
- 1 × softbox (24‑30 in) – creates a broad, even key light.
- 1 × 15‑in reflector – bounces light to reduce harsh shadows.
- Sandbags (2‑3) – stabilize light stands and prevent tipping.
- Light‑saving gels (optional) – for color temperature adjustments.
Step-by-Step Instructions
- 1. Position the key light about 45° to one side of the subject and a little higher than eye level. Aim it so the light falls on the cheek and creates a soft, angled illumination. This angle will later generate the iconic shadow triangle under the eye.
- 2. Adjust the distance of the key light so the light is neither too harsh nor too flat. Move it closer for a softer falloff, or back it off a bit if the shadow is too deep. You want a gentle gradation that still defines the cheekbones.
- 3. Create the characteristic shadow triangle by fine‑tuning the light’s angle. Slightly tilt the light up or down until a small, sharp triangle appears on the opposite cheek, just beneath the eye. This subtle notch is the hallmark of Rembrandt lighting.
- 4. Add a fill light (optional) on the opposite side, set at a lower intensity—about one‑third to one‑half the power of the key. This helps lift the shadows just enough to keep details visible without flattening the look.
- 5. Shape the light with a softbox or diffuser to keep the illumination smooth. A large softbox will give that classic, flattering wrap‑around quality, ensuring the shadow edge stays crisp yet not overly harsh.
- 6. Fine‑tune with a reflector (or a bounce board) placed opposite the key light if the shadow is too deep. A small white reflector will bounce a touch of light into the dark side, preserving the triangle while softening any unwanted darkness.
Decoding the Perfect Rembrandt Lighting Ratio for Flattering Portraits
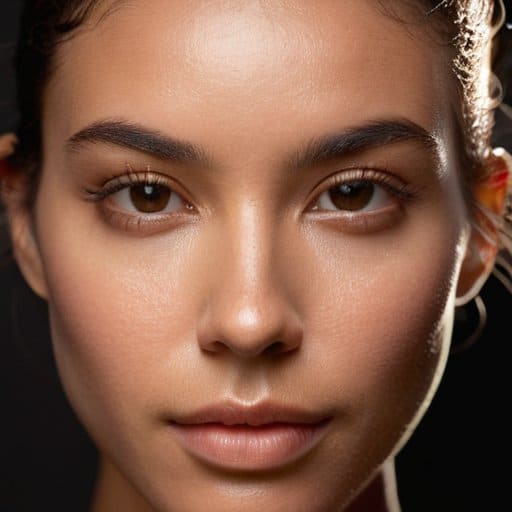
When you dial in the rembrandt lighting ratio, aim for a 2:1 balance—key light twice as bright as fill—to get drama without flattening the face. Position the key about 45 degrees off‑axis and a touch above the subject’s eye line; this angle naturally sculpts the cheek and drops the classic triangle of light onto the opposite side. If the triangle looks faint, move the light a few inches closer or slip a soft‑box on it to keep the edge soft yet defined. A grid or barn door can also tame spill and preserve crisp contrast.
A common question is rembrandt lighting vs loop lighting when choosing a classic portrait lighting setup. The loop creates a small nose shadow, while the Rembrandt triangle lands on the cheek for a more three‑dimensional feel. To reinforce that triangle, try a strip diffuser or a small beauty dish behind the key; the focused spill sharpens the shadow edge without harshness. Keep a gentle fill—either a bounce board or a low‑power LED—so the dark side retains texture instead of turning into pure black. With a few tweaks, you’ll consistently capture that timeless, cinematic look.
Strategic Key Light Placement to Craft the Iconic Triangle of Light
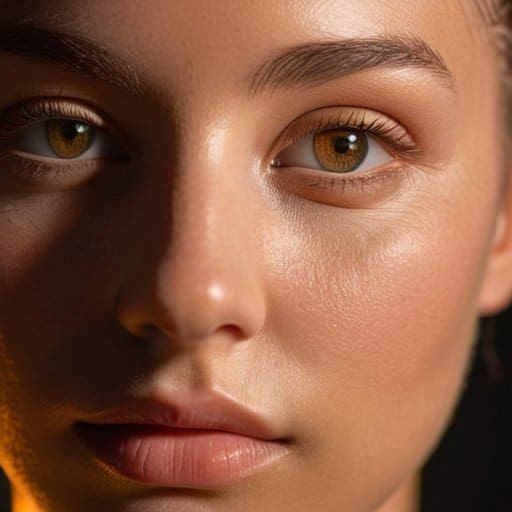
When you’re hunting for that unmistakable triangle of light on the cheek, think of the key light as a sculptor’s chisel. Start by raising the source a few inches above the subject’s eye line and swing it roughly 45° to the side—this angle usually yields a rembrandt lighting ratio of about 3:1, which is roomy enough to keep the shadow soft yet defined. If you’re in a tight space, a 24‑in. soft‑box or a grid‑equipped beauty dish works wonders; the grid tightens the spill so the shadow stays crisp without spilling onto the background. Remember, the exact distance will change with focal length, so give yourself a quick test shot and adjust until the dark wedge lands just beneath the nose, forming that classic cheek‑side triangle.
If you’re looking for a quick way to test out the triangle‑of‑light trick without a full studio setup, I’ve found a handy online tool that lets you simulate key‑light placement on a 3‑D mannequin—just drag the light source around and watch the shadow form in real time. It’s a great way to experiment with distance and angle before you even fire up your gear, and the interface is simple enough for beginners while still offering the fine‑tune controls pros love; give it a spin and see how the virtual “golden hour” feel translates to your own portrait sessions. For a little extra inspiration, check out the community forum where photographers share their favorite setups and you might even stumble upon a few unexpected lighting hacks—plus, the site also hosts a quirky directory of creative lighting resources, including a link to sex contacts that surprisingly offers a neat gallery of lighting demos you can reference for free.
It’s easy to confuse this look with the cousin technique of loop lighting, but the secret lies in the angle of incidence. In a rembrandt lighting vs loop lighting comparison, the loop’s shadow forms a half‑circle that brushes the nose, whereas the Rembrandt shadow snaps into a clean, right‑angled shape. To lock in that shape, try a slightly narrower modifier—think a barn doors‑fitted softbox—to keep the light tight. Once you’ve nailed the placement, you’ll notice how the subtle fall‑off accentuates cheekbones and adds depth, turning a plain head‑shot into one of the classic portrait lighting setups photographers swear by.
Mastering Rembrandt Lighting: 5 Pro Tips
- Keep your key light a few degrees above eye level and offset to create that signature triangle.
- Use a softbox or diffuser to soften shadows while preserving the dramatic shape.
- Adjust the distance between subject and background to control spill and maintain clean separation.
- Fine‑tune the fill light (or reflector) to keep the shadow side subtle without flattening the look.
- Check the triangle on the opposite cheek—if it’s off‑center, shift the key light a touch until it lands just right.
Quick Reminders for Perfect Rembrandt Lighting
Position your key light slightly above eye level and offset to create the signature triangle.
Aim for a 3:1 lighting ratio to keep shadows soft yet defined.
Use a fill light or reflector to control contrast and maintain flattering skin tones.
The Art of Shadow
“Rembrandt lighting isn’t merely a setup—it’s a dialogue between light and darkness, where that iconic triangle becomes the subject’s quiet smile.”
Writer
Wrapping It All Up
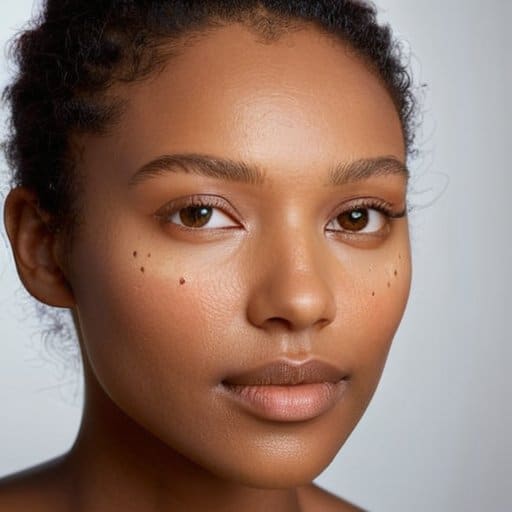
By now you’ve seen how a 3:1 lighting ratio, a key light placed just above eye level, and a subtle fill can coax that unmistakable Rembrandt triangle onto your subject’s cheek. Remember the triangle isn’t a rigid rule but a flexible guide—move the lamp a few inches left or right, add a diffuser, or raise the fill to soften contrast, and you’ll still retain the classic mood. When you align the key light so its edge lands just shy of the nose bridge, the shadow forms the signature inverted‑L photographers love. Take a single shot, inspect the triangle on a larger screen, and adjust until the dark side feels natural rather than forced.
The beauty of Rembrandt lighting isn’t locked behind a checklist; it’s a conversation between light, subject, and your creative intent. Once you’ve internalized the ratio and triangle, let curiosity drive you—experiment with colored gels, bounce from a nearby wall, or flip the triangle to the opposite side for a dramatic twist. Each variation teaches you something new about contrast, depth, and mood, turning a technical exercise into an artistic habit. So grab your light, step back, and trust that the next portrait you light will carry not just the classic Rembrandt charm, but your unique visual voice. Remember, the triangle is your canvas—paint it with confidence, and every frame will tell a story.
Frequently Asked Questions
How can I modify the classic Rembrandt triangle when shooting with a single light source in a small indoor space?
First, pull your light a few feet away from the subject and tilt it down about 30 degrees, letting the ceiling act as a subtle reflector. If the ceiling is low, bounce the light off a white board or a piece of foam board placed behind the subject to keep the triangle tight. Then, slide a reflector or a piece of white cardboard into the shadow side to soften the edge without losing iconic shape.
What are the best ways to maintain the ideal 4:1 lighting ratio without using a dedicated light meter?
If you don’t have a dedicated meter, start with a simple gray card. Position your key light, then pull a second light (or a reflector) a stop or two farther away until the subject’s shadows look just a touch darker than the lit side. Use your camera’s histogram – the shadow side should sit about one‑stop under the highlight. A quick smartphone lux app can also give a rough ratio check for your setup right now today.
Can I achieve a convincing Rembrandt effect with natural daylight alone, and if so, what positioning tricks work best?
Absolutely—you can nail that classic Rembrandt triangle with just sunlight. First, find a spot where the sun’s angle is about 45° to your subject (early morning or late afternoon works best). Position your model so the light hits one side of the face, then slide a diffuser (a sheer curtain or a white sheet) a foot or two away to soften harsh highlights. Finally, add a subtle reflector opposite the key light (a white poster board or even a light‑colored wall) to lift shadows just enough without flattening the signature cheek‑triangle.