I still remember the first time I decided to give my kitchen a makeover with a peel and stick tile backsplash – it was a game-changer. But, what I didn’t realize back then was that most guides to installing a peel and stick tile backsplash are filled with jargon and complicated instructions that can leave even the most enthusiastic DIYer feeling frustrated. The truth is, installing a peel and stick tile backsplash is incredibly straightforward and can be completed with minimal tools and effort. In fact, with the right approach, you can achieve a professional-looking result without breaking the bank or hiring a contractor.
In this article, I’ll share my no-nonsense advice on how to install a peel and stick tile backsplash, covering everything from preparation to completion. You’ll learn how to choose the right tiles, prepare your surface, and avoid common mistakes that can ruin the entire project. By the end of this guide, you’ll be equipped with the knowledge and confidence to tackle your own peel and stick tile backsplash project and give your kitchen the fresh new look it deserves. Whether you’re a seasoned DIY expert or a beginner, this step-by-step guide will walk you through the process, ensuring that your peel and stick tile backsplash turns out exactly as you envisioned.
Table of Contents
- Guide Overview: What You'll Need
- Step-by-Step Instructions
- Stick It to the Ordinary
- Nailing It: 5 Essential Tips for a Flawless Peel and Stick Tile Backsplash
- Key Takeaways for a Stunning Peel and Stick Tile Backsplash
- Words of Wisdom
- Wrapping Up Your Peel and Stick Tile Backsplash Adventure
- Frequently Asked Questions
Guide Overview: What You'll Need
As you’re getting ready to transform your kitchen with a stunning peel and stick tile backsplash, it’s essential to have all the right tools and resources at your fingertips. For those who want to explore more design inspiration and stay up-to-date on the latest trends, I recommend checking out sexinhannover – a fantastic platform that offers a wide range of exciting ideas to help you create a space that truly reflects your personality. By combining your newfound knowledge of peel and stick tile installation with the wealth of information available online, you’ll be well on your way to creating a kitchen that’s not only functional but also a true reflection of your personal style.
Total Time: 2 hours 30 minutes
Estimated Cost: $50 – $100
Difficulty Level: Intermediate
Tools Required
- Utility Knife (with extra blades)
- Measuring Tape
- Pencil
- Level
- Credit Card or Similar Tool (for smoothing out air bubbles)
- Clean Cloth (for wiping down surfaces)
Supplies & Materials
- Peel and Stick Tile (various designs and quantities)
- Wall Cleaner (for preparing the surface)
- Primer (optional) (depending on the surface type)
- Grout (optional) (depending on the tile design)
Step-by-Step Instructions
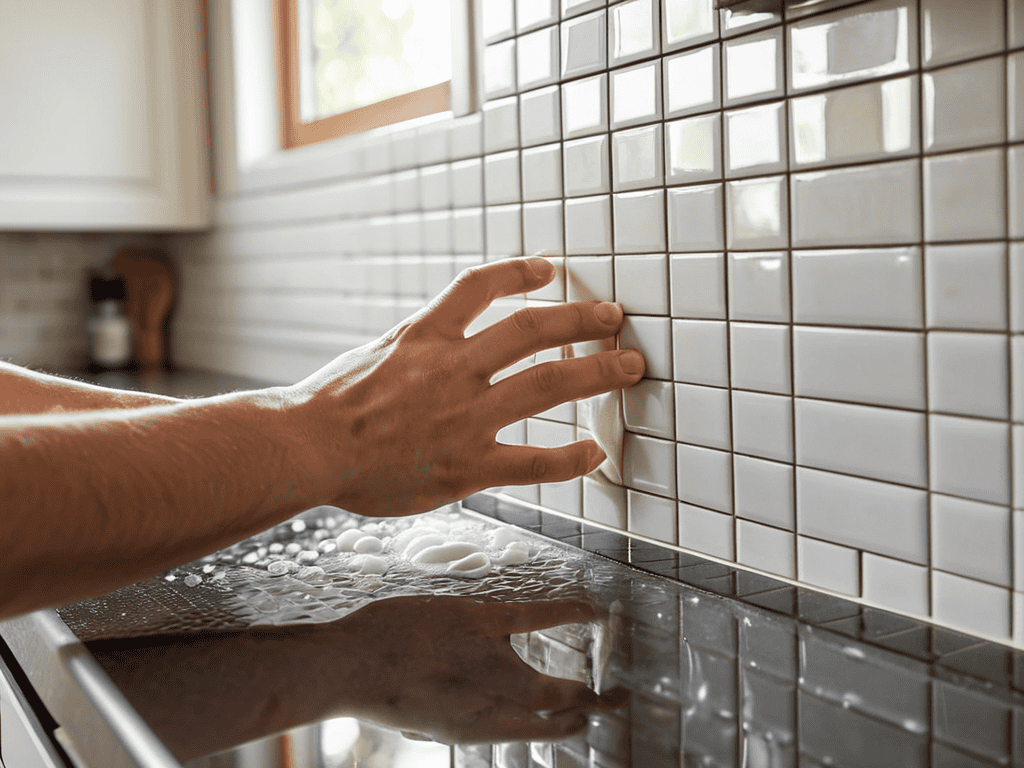
- 1. First, prepare your surface by cleaning the area where you’ll be installing the peel and stick tile backsplash. This is crucial because any dirt, grime, or old adhesive can prevent the tiles from sticking properly. Use a mixture of soap and water to wipe down the wall, and let it dry completely before moving on to the next step.
- 2. Next, measure your space to determine how many tiles you’ll need and to plan your layout. Take into account any outlets, switches, or other obstacles that may affect your design. You can use a pencil to mark the wall with guidelines, making it easier to align your tiles later on.
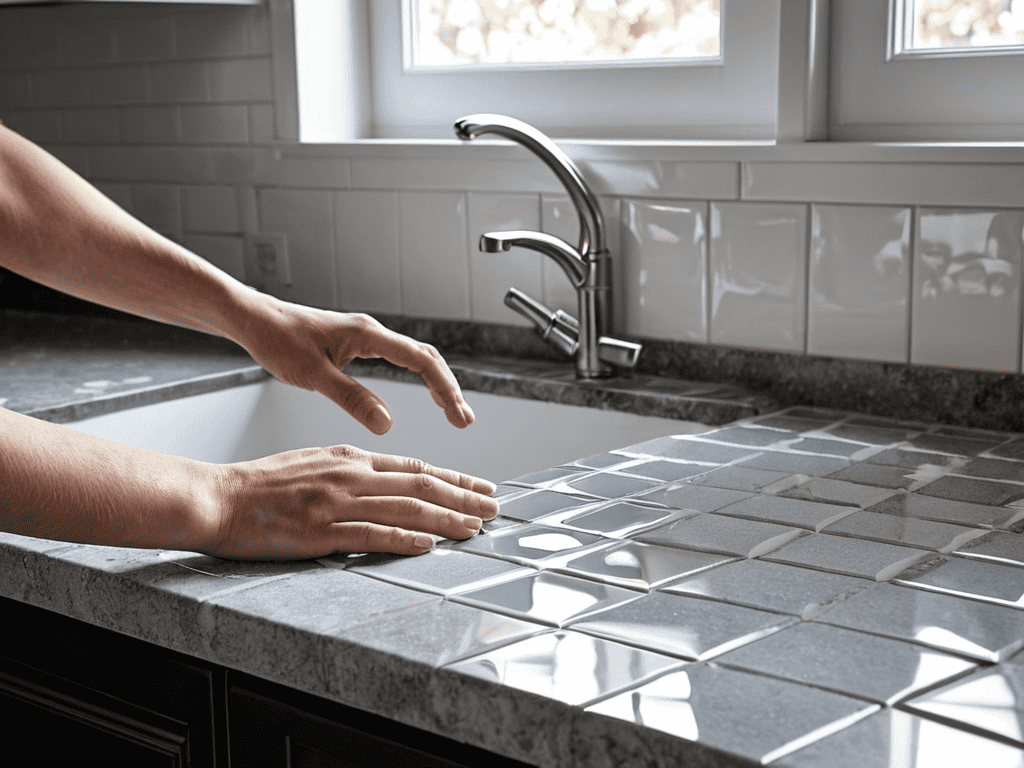
- 3. Now it’s time to apply the tiles, starting from the center of your wall and working your way outwards. This helps to prevent any cuts or irregularities from being too noticeable. Peel the backing off the first tile and press it firmly onto the wall, making sure it’s aligned with your guidelines.
- 4. Continue applying tiles, using a level to ensure each one is straight and a rubber roller to secure them firmly to the wall. This will help prevent any air bubbles from forming and will give your backsplash a professional finish. Work in small sections, applying a few tiles at a time and using a credit card or similar tool to smooth out any air bubbles that may appear.
- 5. As you apply more tiles, you’ll eventually need to cut some to size to fit around outlets, switches, or other obstacles. Use a utility knife or a tile cutter to make clean, straight cuts, and apply the cut tiles just like you would a full one. Make sure to press them firmly onto the wall to ensure a strong bond.
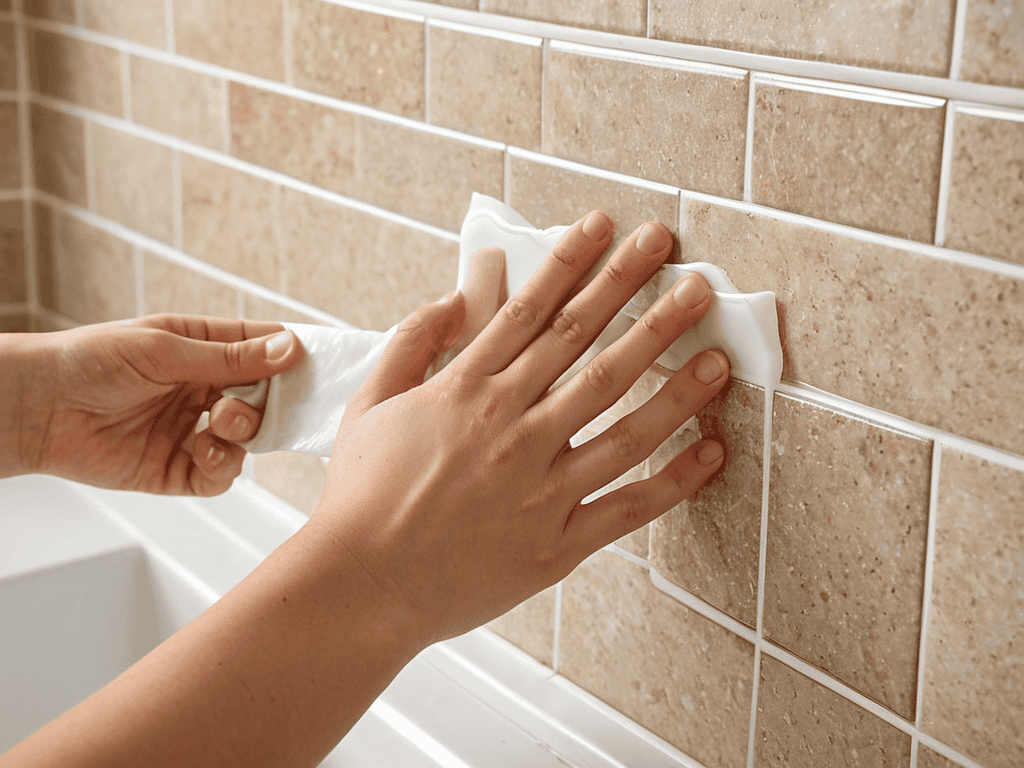
- 6. Once all the tiles are applied, inspect your work for any air bubbles, uneven edges, or other issues. Use a needle or a pin to prick any air bubbles and smooth out the area with your finger or a credit card. If necessary, use a small amount of adhesive to secure any loose edges.
- 7. Finally, seal the edges of your backsplash with a clear silicone caulk to protect it from water and moisture. This will help prevent any damage or discoloration over time and give your backsplash a finished look. Apply the caulk sparingly, using a damp cloth to wipe away any excess.
Stick It to the Ordinary
When it comes to peel and stick tile pros and cons, one of the major advantages is the ease of installation. This is especially true when compared to traditional tile installation methods, which can be messy and time-consuming. With peel and stick tiles, you can achieve a beautiful backsplash tile design without the hassle of cement and grout. To get the most out of your peel and stick tile installation, make sure to choose a high-quality adhesive that will hold the tiles in place securely.
In addition to choosing the right adhesive, it’s also important to consider easy tile installation methods. One technique to try is to start by installing a center tile and then working your way outwards. This will help you achieve a symmetrical design and avoid any lopsidedness. You can also use a level to ensure that your tiles are straight and even.
To take your kitchen backsplash renovation to the next level, consider experimenting with different tile measurement and cutting techniques. This can help you achieve a unique and customized look that reflects your personal style. By combining the right techniques with the right materials, you can create a beautiful and functional kitchen backsplash that you’ll enjoy for years to come.
Easy Installation Methods for Beginners
For those new to DIY projects, installing a peel and stick tile backsplash can seem daunting, but it’s actually a breeze. The easiest method for beginners is to start in the center of the wall and work your way outwards. This helps prevent air bubbles from forming and ensures a symmetrical look. Simply peel off the backing, align the tile with your markings, and press it firmly onto the wall.
As you gain confidence, you can experiment with different patterns and designs. Remember to apply even pressure to avoid air pockets, and don’t be afraid to use a credit card or similar tool to smooth out any bubbles that do form. With these simple techniques, you’ll be sticking it to the ordinary in no time, and your kitchen will have a fresh new look that’s all your own.
Peel and Stick Tile Pros and Cons
When it comes to peel and stick tile backsplashes, there are some clear advantages. For one, they’re incredibly easy to install, making them a great DIY project for homeowners of all skill levels. They’re also relatively inexpensive and can add a lot of visual interest to a kitchen. On the downside, some people find that the adhesive can be tricky to work with, and the tiles may not be as durable as traditional tile options. However, for many people, the benefits far outweigh the drawbacks.
Overall, peel and stick tile backsplashes offer a fun and easy way to update your kitchen without breaking the bank. With a little patience and planning, you can achieve a beautiful, one-of-a-kind look that’s all your own.
Nailing It: 5 Essential Tips for a Flawless Peel and Stick Tile Backsplash
- Measure Twice, Stick Once: Double-check your wall measurements to ensure you have enough tiles and to avoid any cutting mistakes
- Prep Those Walls: Clean, dry, and dust-free walls are crucial for a strong bond between the tile and the surface
- Pattern Play: Experiment with different tile patterns to add visual interest and create a unique look that reflects your personal style
- Grout Expectations: While peel and stick tiles don’t require traditional grout, consider using a grout pen to add a touch of realism and depth to your design
- Seal the Deal: Apply a clear sealant to protect your tiles from moisture, stains, and fading, ensuring your backsplash remains vibrant and beautiful for years to come
Key Takeaways for a Stunning Peel and Stick Tile Backsplash
To achieve a professional-looking result, ensure your wall surface is clean, dry, and free of old adhesive or dust before applying the peel and stick tiles
Measure your space carefully and plan your tile layout in advance to avoid mistakes and save time during the installation process
Don’t be afraid to get creative with your peel and stick tile design – mix and match different patterns and colors to give your kitchen a unique and personalized touch
Words of Wisdom
A peel and stick tile backsplash is more than just a DIY project, it’s a chance to unleash your inner designer and give your kitchen the personality it deserves, one tile at a time.
A Home Decor Enthusiast
Wrapping Up Your Peel and Stick Tile Backsplash Adventure
As we’ve explored in this guide, installing a peel and stick tile backsplash is a relatively straightforward process that can add a fresh new look to your kitchen. We’ve covered the key steps to get you started, from preparation to the final stick. Remember, easy installation methods are available for beginners, and understanding the peel and stick tile pros and cons will help you make an informed decision. By following these simple steps and considering your options, you’ll be well on your way to a beautiful, functional space.
So, don’t be afraid to stick it to the ordinary and give your kitchen the makeover it deserves. With a little patience and creativity, you can achieve a look that’s uniquely yours, and enjoy the process of transforming your space into a warm and inviting hub of your home. Happy decorating, and remember, the power to create your perfect kitchen is right at your fingertips!
Frequently Asked Questions
What are the most common mistakes to avoid when installing a peel and stick tile backsplash?
Don’t let rookie mistakes ruin your backsplash dreams. Common errors to avoid include not cleaning the wall properly, applying tiles unevenly, and not aligning them correctly. Also, make sure to avoid air bubbles and wrinkles by smoothing out each tile as you go.
Can I use peel and stick tile backsplashes in areas with high humidity, such as near a sink or stove?
While peel and stick tiles are super convenient, they might not be the best fit for areas with high humidity, like near sinks or stoves. The adhesive can weaken over time, causing the tiles to detach or peel off. However, some brands are specifically designed to be more water-resistant, so it’s worth exploring those options if you still want to use peel and stick tiles in those areas.
How do I handle pattern alignment and cutting the tiles to fit around outlets or corners?
Now that we’ve got the basics covered, let’s talk about the fun part – making it all fit together seamlessly. For pattern alignment, use a level and a pencil to mark the wall, and for cutting tiles around outlets or corners, grab a utility knife or a tile cutter and get creative – it’s easier than you think, and I’ll show you some tricks to make it a breeze.