
I still remember the first time I tried to build my own custom PC – it was a total disaster. I mean, who needs a social life when you can spend hours watching YouTube tutorials and reading forums, right? But seriously, I was stuck on the same “a guide to building a custom pc” for weeks, trying to figure out what I was doing wrong. It wasn’t until I took a step back and realized that most guides are either too vague or too technical that I finally started to make progress. That’s why I’m excited to share my own experience and tips with you, so you can avoid the same pitfalls and create your dream rig.
So, what can you expect from this article? I’ll be giving you the lowdown on the entire process, from choosing the right components to _troubleshooting common issues_. My goal is to provide you with honest, no-hype advice that will make building a custom PC a breeze. Whether you’re a total newbie or just looking to upgrade your current setup, this guide is for you. I’ll be sharing my personal anecdotes, tips, and tricks to help you navigate the world of custom PC building and come out on top with a rig that’s both powerful and sleek.
Table of Contents
Guide Overview: What You'll Need
Total Time: 4 hours 30 minutes
Estimated Cost: $800 – $1,500
Difficulty Level: Intermediate / Hard
Tools Required
- Screwdriver (both flathead and Phillips)
- Torx driver (for CPU cooler and motherboard)
- Pliers (for gripping small components)
- Wire cutters (for cutting cable ties and wires)
- Thermal paste applicator (for applying thermal paste to CPU)
Supplies & Materials
- CPU (choose from Intel or AMD)
- Motherboard (compatible with chosen CPU)
- RAM (at least 16 gigabytes)
- Storage Drive (solid state drive or hard disk drive)
- Power Supply (wattage depends on system configuration)
- Graphics Card (optional, but recommended for gaming)
- Case (choose from various sizes, such as mid tower or full tower)
- Cooling System (choose from air or liquid cooling)
- Operating System (choose from Windows, Linux, or macOS)
Step-by-Step Instructions
- 1. First, let’s talk about picking the right components for your custom PC. This is where most people get overwhelmed, but trust me, it’s easier than choosing the perfect pair of limited-edition sneakers. You’ll need to decide on a CPU, motherboard, RAM, storage, and a power supply. Make sure they’re all compatible with each other, or you’ll be in for a world of trouble.
- 2. Next, unboxing and preparing your components is key. I love the feeling of unwrapping a brand new CPU or GPU – it’s like unwrapping a fresh pair of kicks. Take your time, and make sure you have all the necessary tools, like a screwdriver and some thermal paste. Don’t static shock your components, or you’ll be in for a costly mistake.
- 3. Now it’s time to assemble the CPU and motherboard. This is the most crucial part of the process, and it requires some finesse. Take your motherboard and carefully remove it from its packaging. Locate the CPU socket and gently insert the CPU, making sure it’s aligned properly. Secure it with the mounting mechanism, and apply a thin layer of thermal paste to the CPU die.
- 4. The next step is to install the RAM and storage. This is where things can get a bit tricky, but don’t worry, I’ve got you covered. Take your RAM modules and insert them into the slots on the motherboard, making sure they’re securely fastened. Then, install your storage drive – whether it’s an SSD or an HDD – and connect it to the motherboard using a SATA cable.
- 5. Now it’s time to install the power supply. This is the heart of your custom PC, and it needs to be powerful enough to handle all your components. Take your power supply and install it in the case, making sure it’s securely fastened. Connect the power cables to the motherboard, CPU, and other components, and make sure everything is properly wired.
- 6. The next step is to install the GPU, if you’re using a dedicated graphics card. This is where things can get a bit tricky, but don’t worry, I’ve got some experience with this. Take your GPU and carefully remove it from its packaging. Install it in the PCIe slot on the motherboard, making sure it’s securely fastened. Connect the power cables to the GPU, and make sure it’s properly seated.
- 7. Finally, it’s time to put everything together and turn on your custom PC. This is the moment of truth – will it boot up, or will it be a disaster? Take your time, and make sure everything is properly connected. Plug in the power cord, press the power button, and cross your fingers. If everything is installed correctly, you should see your custom PC come to life.
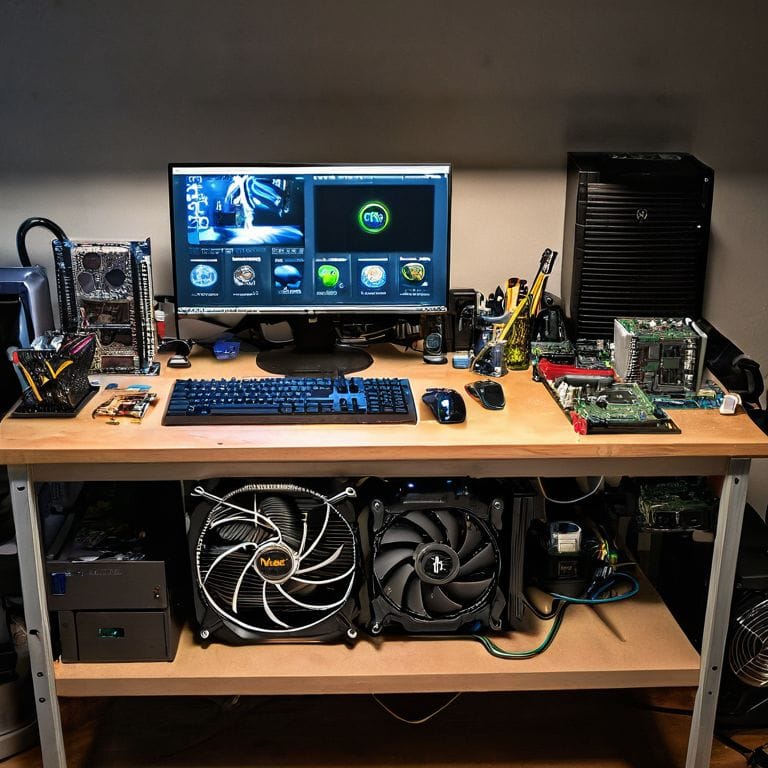
Unleash Custom Pc Power
Now that you’ve got your custom PC up and running, it’s time to unleash its full potential. One of the most important aspects of a high-performance custom PC is high performance cpu cooling. A good cooling system can make all the difference in maintaining optimal temperatures and preventing overheating. When it comes to custom pc build plans, it’s essential to consider the cooling system as a top priority.
To take your custom PC to the next level, consider a custom pc case modification. This can include installing custom fans, LED lighting, or even a custom watercooling loop design. Not only will this improve the overall aesthetic of your PC, but it can also enhance its performance. For gamers, a best budget gpu for gaming is also crucial for a seamless gaming experience.
When building a custom PC, it’s all about finding the right balance between performance and noise levels. A silent pc build guide can be incredibly helpful in achieving a quiet and efficient system. By following these tips and considering your custom pc build plans, you can create a powerful and unique PC that meets your specific needs and preferences.
Crafting Custom Pc Build Plans
Now that we’ve unleashed the power of custom PCs, it’s time to get strategic about building them. Crafting a solid plan is key to creating a rig that’s both a beast and a beauty. I’m talking about considering your budget, the type of performance you need, and the aesthetics you’re going for – because, let’s be real, a custom PC is as much about looks as it is about specs.
For me, planning a build is all about finding that perfect balance between form and function. I consider what components will give me the best gaming performance, while also thinking about how they’ll look in my setup. It’s all about creating a cohesive vision, from the CPU to the casing. By taking the time to carefully plan your build, you’ll end up with a custom PC that’s not only ridiculously powerful, but also a stunning addition to your gaming den.
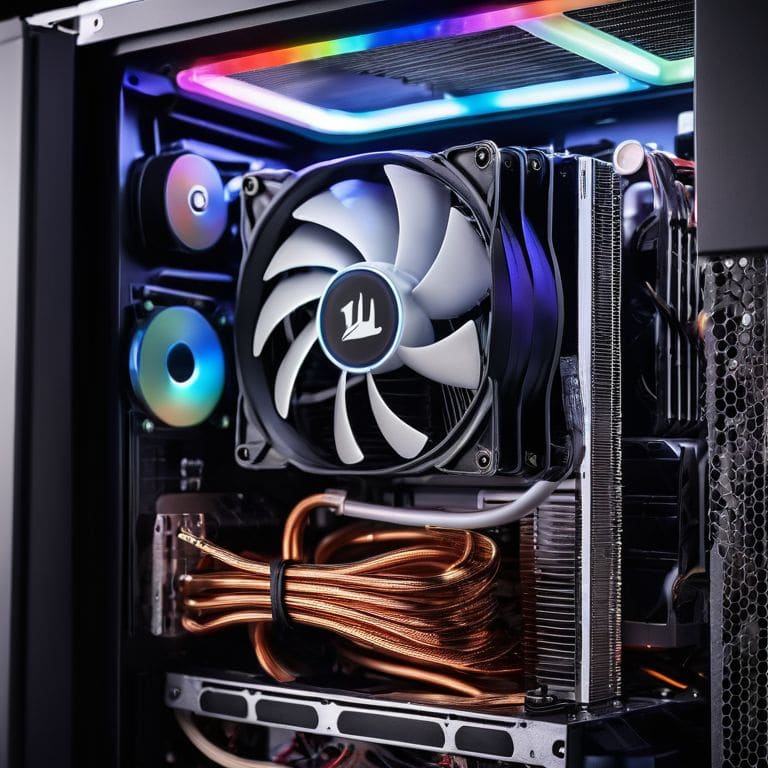
High Performance Cpu Cooling Hacks
To take your custom PC to the next level, you need a sick CPU cooling system. I’m talking about a setup that’s not just functional, but also a beast to look at. When it comes to high-performance CPU cooling, I’m all about liquid cooling – it’s the way to go for a truly lit rig. You can opt for a closed-loop system or go all out with a custom loop, but trust me, the results are worth it.
I’ve seen some wild custom cooling setups in my time, from glow-in-the-dark tubing to insane overclocking capabilities. If you’re feeling adventurous, you can even add some LED strips to make your cooling system a work of art. The key is to find the right balance between form and function – your CPU cooling system should be both a performance powerhouse and a visual stunner.
Level Up Your Custom PC Game: 5 Essential Tips
- Choose the right CPU and motherboard combo to avoid compatibility issues and ensure a seamless building experience
- Ditch the stock cooler and opt for a high-performance CPU cooling system to keep your temperatures in check and your overclocking dreams alive
- Don’t skimp on the RAM – 16 GB is the minimum, but 32 GB or more is where the magic happens, trust me, you won’t regret it
- Select a graphics card that fits your needs, whether you’re a gamer, content creator, or just a casual user, and make sure it’s compatible with your build
- Plan ahead and consider cable management from the start, it’s a total game-changer for aesthetics and airflow, and will make your build look like a work of art
Top Takeaways for Your Dream Custom PC
To build a custom PC that’s a real head-turner, don’t be afraid to get creative with your component choices and make sure they align with your specific needs, whether that’s gaming, content creation, or just showing off your rig
High-performance CPU cooling is crucial for maintaining top speeds and preventing overheating – consider liquid cooling solutions or advanced air cooling systems to keep your temps in check
Remember, it’s all about the details: from sleek cable management to a visually striking case, the little things can make or break the overall aesthetic and ‘cool factor’ of your custom PC build
Building Your Dream Rig
A custom PC is more than just a machine – it’s a reflection of your style, your personality, and your passion for innovation, so don’t be afraid to think outside the box and push the limits of what’s possible!
Jake Collins
Wrapping Up Your Custom PC Journey
We’ve covered a lot of ground in this guide, from the basics of choosing your components to the more advanced topics like high-performance CPU cooling hacks. By now, you should have a solid understanding of how to craft a custom PC build plan that suits your needs and budget. Remember, building a custom PC is all about experimentation and having fun, so don’t be afraid to try new things and make mistakes. Whether you’re a gamer, a content creator, or just someone who wants a powerful machine for everyday tasks, the world of custom PCs has something for everyone.
As you finish up your build and plug in that power cord for the first time, I want you to remember that this is just the beginning. Your custom PC is a key to unlocking new possibilities, whether that’s exploring the latest games, creating stunning visual effects, or simply staying connected with friends and family. So go ahead, push the boundaries of what’s possible, and see where your new custom PC takes you. With the right mindset and a bit of tech savvy, the future of computing is truly in your hands.
Frequently Asked Questions
What are the most important factors to consider when choosing the right CPU and motherboard for my custom PC?
Yo, when choosing a CPU and motherboard, I’m all about that combo, you feel? You gotta consider the socket type, clock speed, and cores – it’s all about finding that perfect balance between power and budget, bro!
How do I ensure proper cable management and airflow within my custom PC case?
Yo, cable management and airflow are key! I’m talking zip ties, cable ties, and a solid case with ample ventilation. Think about it like a fresh pair of kicks – you want that sleek look and feel. Route those cables like a pro and make sure your case has got some serious airflow game, trust me, it’s a total vibe.
What are some common mistakes to avoid when installing and configuring the operating system on my new custom PC?
Yo, don’t get caught slippin’! When installin’ your OS, avoid overloadin’ with unnecessary software, and make sure you’re runnin’ the latest BIOS – trust me, it’s a game-changer. Also, don’t sleep on partitionin’ your drive, it’s key for keepin’ your system organized and runnin’ smooth.


